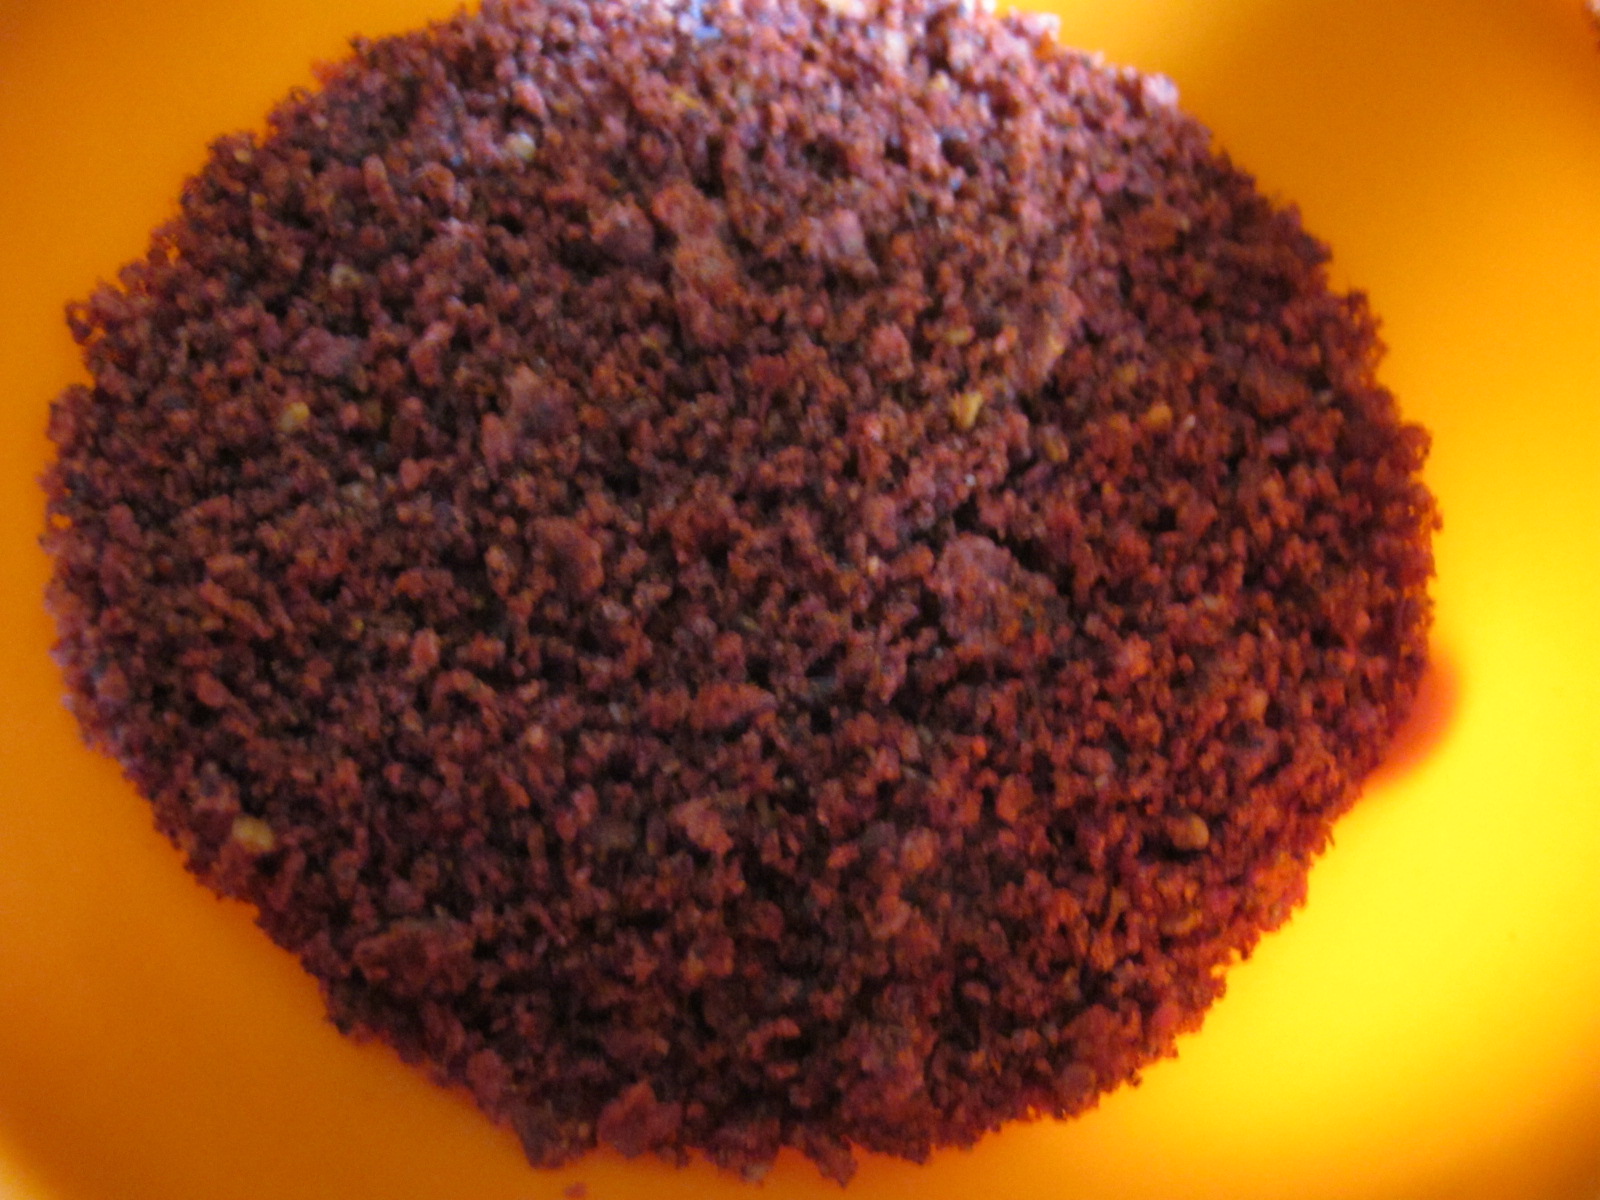
07 August 2014

Roasted Hot Sauce with Peaches

Enjoying the Summer Heat with some kick? I am. I love anything to do with chili peppers.  I really missed growing them for the last two years out in Texas. The patio just didn't have enough sunlight to really support those fiery fruits. Luckily, Mom has been bagging and freezing all those cayenne and jalapenos that she's been growing.

Now, I typically love habaneros but those peppers tend to knock more than just the socks off people. So I’m toning it down with some more palatable peppers. I like my sauce thick and creamy instead of watery like you get from the bottle. And since I'm trying to use what is in season, I’m going to use peaches and yellow grape tomatoes to add a little bit of sweetness to cut some of the heat. Sauce will look the color of rich medium-dark caramel once finished cooking.  

If you’ d like it much sweeter and less tangy, use nine large peaches, no tomatoes, 3/4 quart apple cider vinegar, and one quart less peppers. Personally, I like my sauce to have some tang and only slightly sweet. And this how I brought the heat...

Roasted Hot Sauce with Peaches (makes 15 pints)

On two large sheet pans, bake at 350. Rotate peppers every 20 minutes, do this twice. And then turn oven off and let rest for 20 minutes in oven (cook time 1 hour),

  • 1 gallon bag of whole cayenne peppers, stem removed
  • 1 gallon bag of whole jalapenos peppers, stem removed
  • 4 large garlic cloves, crushed to remove paper shell
  • 2 medium white onions,1/2 inch sliced
  • Extra Virgin Olive oil to coat everything

After peppers have cooled down. Place roasted peppers, onions, garlic into food processor. Blend on high and place in large sauce pot with lid on low-medium for 30 minutes. 

Note: I pureed the yellow grape tomatoes in the processor after the pepper mixture. This helps remove all the small pepper pieces left in the processor to add back into the sauce and so you can keep the tomato skins.

  • 1 quart apple cider vinegar
  • 1 pint of yellow grape tomatoes, pureed
  • 3 large peaches, peeled and crushed
  • 2 T salt

After mixture has simmered and peaches break down, use hand blender to smooth out sauce. Add filtered water if too thick to blend. Place sauce in clean mason jars for canning.

Peach Hot Sauce
I used 12 pint size jars and one 4 oz jar for canning. And I used one quart and one 4 oz jar that I put in fridge to use now.

Submerge jars with lids in a water bath that will come to a boil for 15 minutes. Remove and wait to hear a pop sound for each jar. That means its sealed.

You can make a much smaller batch. But this should last you all year and enough to share with some friends. Enjoy! :)

01 August 2014

Peach Jam Preserves

Oh peaches, how you've alluded me... As long as I can remember, my Father's Mother always had peach trees in her back yard. If I was lucky Grandma would make peach cobbler which fortunately she did make some for me this past week. :)Yum! Sadly, something has caused her tree's peaches to rot this year and she only had enough to make one cobbler with five peaches. I'm suspecting the culprit is some type of beetle that has infested the tree. 

Well, next best option in Huntsville area to get fresh Peaches is Scott's Orchard in Athens. They have the best peaches, seriously Georgia has nothing on these peaches. I snagged a small basket of six and used three large ones to make this batch of jam. As peaches cook, they will look pinkish orange to a medium dark orange once they are canned. For this recipe, I added a little warmth to the preserves by using fresh cardamon pods. I took one pod and smashed with the flat side of my knife. Removed the seeds and mashed with pestle and mortar to make fresh cardamon powder. It's such an aromatic spice, I love it almost as much as cinnamon.

Small Batch Peach Jam Preserves

Peaches dusted with cardamon and nutmeg

In 4-quart pot, heat on low-medium

·        3 C fresh peaches, chopped
·        2 T fresh lemon juice
·        3 T filtered water
·        1 pinch of nutmeg (1/8 t)
·        1 pinch of fresh cardamon (1/8 t)
·        6 T sugar (organic preferably)

When most of the peaches have cooked down, add

·        3.5 T pectin

Continue to stir to ensure pectin is evenly distributed and turn off stove. Prepare Jars for Canning.

Peach Jam
I choose to place jam into five 4-oz mason jars for canning. 

Submerge jars with lids in a water bath that will come to a boil for 12 minutes. Remove and wait to hear a pop sound for each jar. That means its sealed.


Enjoy! :-)

31 July 2014

Fresh Field Peas

One of my most memorable meals as a kid that I’d have with my father was grilled pork chops, boxed macaroni with cheese, and canned black eyed peas. Nothing could compare to my weekly delight of cooking with my Dad. Those black eyed peas with Toni’s Creole Seasoning and mixing up that Velveeta cheese with shells... 

I find I don’t often eat many things from a can or box if I can help it but I still love peas. Even better than canned black eyed peas is fresh field peas. I was fortunate to have stumbled upon the Decatur, AL farmer’s market on Saturday and bought fresh purple un-hulled pea pods. They look half green to almost all purple. I spent that afternoon hulling peas which with this variety yields pink eyed peas on green bodies.  Hulling peas has a rhythmic motion like crocheting, may be that’s why I love the process of removing the pea from the pod so much. 

Now, 3lbs of un-hulled peas gives about 1 quart + ½ cup of fresh peas. And you just can’t beat the price of $4.50 for that bounty.

Today, I wanted to use smoked turkey necks and cornish game hen stock (rendered the night before). You can use chicken stock, pork stock, smoked ham hock, or whatever is your preference cooking your peas in.

Simmering fresh peas

Fresh Pink Eyed Peas

On Medium, bring stock pot to a simmer


  • 2 small-medium Turkey Necks
  • 1 quart bag of Fresh Pink Eyed Peas, rinsed
  • 1 quart of Cornish Game Hen Stock, with fat


After thirty minutes to a hour, add


  •   1 medium Onion, roughly chopped
  •  2 large Purple Garlic Cloves, smashed and mince (wait ten minutes to add after mincing)

Let simmer till smoked turkey neck meat starts to separate easily with a fork


  •  Salt and Pepper to taste 
  •  Cayenne to taste, if you want a little bit of a kick
And Enjoy! :-)


21 July 2014

BBQ French Onion Soup

One of my favorite things about Summer is enjoying good BBQ. Of course in Texas you can get BBQ in the dead of winter. Truly one of those finger licking good treats. BBQ I love eating you with my hands and getting my fingers all saucy. It's almost as good as feeling dirt between my toes. I do know those are two very different experiences. But hey its Summer, so kick off those shoes and run through the sprinklers. Because those BBQ drenched fingers are going to need a good washing.

I'd have to say my favorite by far is slow cooked beef ribs. My mom used to put them under the broiler with some Cajun dry rub. And the best part of BBQ beef ribs, isn't just eating the meat falling off the bone yummy goodness but saving the bone for making beef stock. Left over BBQ grilled beef or pork bones make a more rustic and rich tasting stock than just beef or pork bones you can get from the butcher. I highly suggest the next time your using the grill this Summer, save your bones whether its ribs, t-bone, or chops. Everything BBQ bone-in is great for making homemade stock.

Making stock is rather a simple process, you just throw the bones in a crock after you've indulged on all the meat trimmings. Cover with filtered water. Set on low and leave over night. I think a 24 hour stock is best but 12-18 hours of simmering is just as good. Once the stock is a nice rich golden brown color, remove the bones and ladle the liquid gold into a glass jar (glass is best). Then refrigerate till ready to use (good for 3 days or 5 if your have your fridge at a cooler setting). Now, you'll notice the stock will have a layer of fat that solidifies on the top of the liquid. Personally, I keep the fat. You don't have to keep it. Just tap it and pull it out in big chunks to throw away. It can be treated just like bacon fat or butter when using it recipes. You will not need to add any salt either while prepping your stock. The rub or sauce originally used on your BBQ will have flavored the bones/cartilage that you have simmering in the crock. I also prefer to salt the stock later than in the cooking process because I'd rather it not be over salted.

A much waited for day or two after BBQing treat...

BBQ French Onion Soup

Melt on medium heat in Large stock pot


  • 1 stick of butter

Add, mix, and simmer onions, stirring occasional till caramelized


  • 6 sprigs of fresh thyme
  • 3 Turkish bay leafs
  • 5 medium thinly sliced yellow onions
  • 2 T minced garlic (3-4 large cloves)
  • ground black pepper

Onions now caramelized, add and let come to a slight boil, then reduce heat


  • 1/2 C red wine (I used a California 2012 blend of different wines)

After wine has evaporated and onions caramelized again, remove thyme stems and bay leafs and add


  • 2 T all purpose flour (preferably organic, non-GMO)

Once most of the flour has been browned with the onions but not sticking too much to the pot, add and let melt


  • beef fat from the stock (this will help scrap the browned flour if sticking to bottom of pot)
BBQ French Onion with shredded Munster

Then add and cover with lid for 2 hours on low-medium

  • 2 quarts BBQ beef stock
  • orange and lemon pepper (I like the little extra citrus notes)
  • ground black pepper and salt (to taste)

Simmer soup on low heat until ready to serve. When ready to serve, ladle BBQ French Onion Soup into a bowl and top with shredded cheese (I choose Munster since that is what I had on hand though I think a saltier cheese would have been better) and buttered, toasted chunks of french baguette pieces or croutons. Enjoy! :-)

18 July 2014

Long over due...Small Batch Jam

I've been wondering if I should start my post as an apology letter to my blog... 
“I contribute my lack of content to my busyness with my work, my other hobbies besides cooking, and keeping up with married life and some of its hardships. I know I should have been more committed to you, blog, you’ll have to accept my absence as an extended vacation/sick leave. Sincerely, ~Am” 

I lost my enthusiasm for writing or doing much of any project after October 2012 when I was hospitalized for food poisoning; my job was terminated; my stepfather’s father, Dick, passed away; and I felt lost in a big city with no purpose. It was a huge blow. Most of the projects I was currently working on went to the back burner. Especially my wedding pictures, which I was organizing into a photo album. They were too painful to look at since Dick wasn't able to attend the wedding and I didn't get to show him any of them. It took some months for me to really pick myself back up after his death. He was the first person of my immediate family to pass away and I took it much harder than I ever expected to. I was fortunate in the Spring of 2013 to have met two wonderful families that carried me the rest of my time in Austin. I didn't look at our relationship as a job per say but more of a friendship that I desperately needed and was honored to be a caregiver for. Kalen’s grandfather also passed away in the Summer of 2013 before we were able to visit him. It was also a painful blow for the both of us in our first year of marriage since he also did not attend the wedding and he could not see the wedding photos. I never thought I’d cry so much after being married. I knew what hardship already was due to my own illness but this hurt was just unreal.  I do think it’s made my relationship that much stronger. And has made me realize that I am in fact growing up.

Now married for two years and some, I feel fortunate to have left Alabama and venture to Austin, Texas. She has had a profound impact on my outlook on lifestyles, love, friendships, and food. I feel much more competent in my culinary skills. In fact, I understand my recipe blunders more easily; I have changed my eating lifestyle to more whole foods and less processed; taught myself to eat and buy seasonal vegetables at the farmers market; and be more frugal on a low income. I never imagined that I’d cut almost all canned goods and boxed foods out of our diet while managing to save money. I think it contributes to the lifestyle that is Austin. There is more availability of quality products and fresher options than just chain groceries. Its contributed to the higher population of Paleo, Vegan, Vegetarian, and GMO-free eating. Don't get me wrong. Kalen and I did eat Texas BBQ which their courses consist of Sausage, Pulled Pork, Brisket and Ribs. Not much room for Vegetables. Oh Franklin's BBQ, you will be missed.We just now make a more conscious effort to eat better for our health.

When I originally left home, I choose actively not to like Austin. She in essence was supposed to be just a pit-stop. Less than a year, I was expected to inhabit this “weird” city.  However as much as life has unexpected twists and turns, so does your expected time line. Now, I will miss the incredible adventures we had. Austin you will be very much missed. Thank you for the last two and a half years of my life.

Now for something a bit sweet and tart to begin again another adventure in my "pit-stop" in Alabama.

Small Batch Blueberry Jam Preserves


I love blueberries. Especially the bushes I planted at my parent's house not long before getting engaged. Now those bushes are in their second season of fruiting and I couldn't be more excited to have the opportunity to make Jam. Not to sweet, the sugar content was significantly reduced since blueberries are naturally sweet and the abundant amount of sugar required in most jam recipes is unnecessary in my opinion. As blueberries cook, they will look red but darken once they are canned. 

Dusted with Nutmeg and Cinnamon

In 4-quart pot, heat on low-medium

·        3 C fresh blueberries
·        1 T fresh lemon juice
·        3 T filtered water
·        1 pinch of nutmeg (1/8 t)
·        1 pinch of roasted siagon cinnamon (1/8 t)
·        6 T sugar (organic preferably)

When most of the berries have popped/split, add

·        3.5 T pectin

Continue to stir to ensure pectin is evenly distributed and turn off stove. Prepare Jars for Canning.

Canned Blueberry Jam Preserves

I choose to place jam into six 4-oz mason jars for canning. You could use three pint size. 

Submerge jars with lids in a water bath that will come to a boil for 15 minutes. Remove and wait to hear a pop sound for each jar. That means its sealed.


Enjoy!

05 June 2012

Rye Bread by Bosch (w/ roast pork and veggies)

Can the Bosch Stand Mixture truly handle 6 loafs worth of bread dough?

My first attempt at making sourdough bread sorta  flopped on my inpatients with the Bosch. I just don't have that trust relationship with him yet. This lead to a bread that was so dense it took forever to finish cooking and was later frozen to use for croutons that I further have to chop up smaller.

This test run I wanted to use Rye Bread because I have a bunch of Caraway seeds that I purchased back in the end of February and H.E.B. had Rye flour on sale. Kalen and I bought two bags.

So...it was best to try a recipe that I used before and triple it to see if the Bosch could handle 6 loafs. And the results...the Bosch performed beautifully and I couldn't be happier. It truly mixes like a work horse. My next adventure will be trying wheat flour. Which will be a much dense and more harder dough to mix. For the mean time. If you have a Bosch or are incline to mix by hand....

Rye Bread by Bosch :)

The Dry
  • 6.75-7c all purpose flour
  • 4c rye flour
  • 1/8c caraway seeds
  • 4t salt
  • 3T sugar
  • 2T yeast
Then add the Wet
  • 3/4c canola oil
  • 3.75c water
Setting Low turn till the flour is gone. Then add,

  • 1/4c skim milk
Continue on low medium. Remove, dough once the milk has absorbed. Knead on a flour board. Return to oiled bowl. And let rise for 2hours or until doubled. Then let the dough hook punch the dough. Let rest for 10minutes. Separate dough into three sections. Do not pull the dough, cut the dough or pinch the dough off with fingers. Knead each loaf and form into oiled pan. Oil the top of the loafs. And let rise 1 hour or until doubled. Pre-heat oven to 350. Brush egg wash over loafs. Then, bake 35 minutes or until hollowed.

Till Next Time...Enjoy!
What a beautiful machine, it preformed above what I was hoping and it sure has heck beats hand mixing 3 batches of rye bread. The bread was moist, fluffy, and overall crunchie crust. Just a wonderful and satisfying bread. It would great with dinner this evening.

Roast Pork Loin with onion, mushrooms, and summer squash

Yes that is gravy (sweet and pepper)


Pan-sear pork (rolled in seasoning, corn meal, and flour mix) with bacon fat. Add water and saki at bottom of pan for steaming chopped onion, mushroom, and summer squash. Put lid on and bake at 350 for 1hr 15minutes. Pull out of oven and let rest with lid on for 30minutes. This keeps all the juice in. The gravy was all the left over boiled veggie and pork juice with 2T of butter, handful of all purpose flour, and ground white pepper. Let reduce and serve over pork.

04 June 2012

Fruit Medley Ice Cream Custard

Long time no see...finally getting back into the grove of things. Great visit out to Huntsville. Too short if you ask me but Kalen and I have to get back to business and water the plants. :P

This week at the grocery stores have been a real treat! Lots of fresh fruits and nice summer squash at the farmers markets. IN LOVE!

So what better to settle back into the Texas heat than with ice cream. :D


Fruit Medley Ice Cream Custard

In food processor, blend till smooth
  • handful of blueberries
  • two handfuls of pitted cherries
  • one pitted plum
  • one pitted peach
  • one peeled kiwi
  • one juiced small lemon
  • one seeded small apple
Heat in sauce pan with
  • 1/2c white sugar
  • 2T brown sugar
Once most of the liquid has been cooked off and the mixture is a bit thick, slightly sticky, set aside and let cool in refrigerator.


In another small pot, blend and heat till custard coats spoon
  • 1.25c skim milk
  • 1t vanilla extract
  • 3 egg yolks
Set aside to cool in fridge.


In a medium bowl, whip 1.25c heavy whipping cream.

Then add, the cooled custard and fruit mixture. Fold all together.


Pour into ice cream maker (for our ice cream maker it was too much so we did two batches) and mix for 30minutes or until ice cream  no longer turns in machine. Freeze in freezer for an hour and serve. Or save for later.

And there you have it...so good!

22 May 2012

Revisiting Sour Dough (part 4)

 Now...does 7 days create a great sour dough starter?

Probably, however, I wasn't patient last night and didn't get the bread I was looking for. I did not add enough flour to it and I did not allow it to rise twice. For that I got a very dense bread. That took what felt like three as times longer to cook. In fact, I had to chop it up smaller after halving it twice. The bread flour made it so dense it was like a brick. Eventually, it finished cooking but it wasn't the bread I was hoping for. Thick chewy bars (1inch*1inch* 3inch).

Over all it had a great taste and I soaked it the next morning in egg/heavy whipping cream wash to make french toast. It turned out pretty good but not fluffy. :(

So did I make a great sour dough? No but I did learn that you have to let it rise twice otherwise you'll get a very heavy surprise in the oven that will just take longer to cook. Here is the recipe I used with .5c milk less. Hopefully it wont be so sticky.

In medium bowl, combine
  • 1 1/3c rye (start with 2/3rds and add as needed)
  • 4.5c bread flour
  • 1T salt
  • 1/3c flax seed meal
  • 1/3c hemp seeds
Then, add
  • 4T warm honey
  • 2c starter
  • 1.5c milk
Let rise for 2 hours, punch, let rest for 10minutes, knead for 10minutes, shape dough, and let rest in pan for 2 hours or until doubled. Heat oven to 350 and bake in greased pan for 35minutes or until hollow.

21 May 2012

Revisiting Sour dough (part 3)

Day 7

Since I was still awake because I was checking the tomatoes and tomato sauce on the dehydrator at 4:30am, I thought I'd see if the sourdough was up to any business. And finally it started doing something.

I'm pretty excited to say that it's doubled in volume. I really feel that the last  few days I wasn't seeing much activity, may have been do to the low humidity and cooler temperature in the apartment.

Apparently, the dehydrator was putting enough moisture and heat in the kitchen that may have been kick starting the sourdough starter. I suspect I'll have to test this theory when I get back from my trip to Dana's wedding this coming weekend.

In the meantime, look... how beautiful...bubbles! :)


20 May 2012

Revisiting Sourdough (part 2)

6oz mason jar, small bubbles forming

Day 2

Mid-day: I stirred the mixture.
End of day: added 1T whole wheat flour and 1T filtered water.

So far I've seen small traces of bubbles but nothing significant. I'm hoping in the morning when I go to stir it. There will have been more activity in the jar. For now I'm keeping my fingers crossed. :)


Mid-day (day 3)

Day 3

Super excited when I check on the starter! I was beginning to wonder if it was every going to double in size. Low and behold we have bubbles!!

Mid-day: stirred the contents with wooden chopstick.

In fact it bubbled up again after stirring it mid-day which leads me to want to transfer to a larger jar. Don't want another volcano incident to clean up.

End of Day: transferred to  two quart mason jar. Added 2T whole wheat flour and 2T filtered water.

Day 4

Mid-day: stirred the contents with wooden spoon.


Not as much activity today. I feel its possibly because I transferred to a different jar and the surface area is bigger now, that the dough has spread out. May be I should of transferred to a  one pint mason jar for better results. I'm sorta sad. :/

End of Day: add 1/4c whole wheat flour and 1/4c filtered water

Day 5

Not much going on
Mid-day: stirred the contents with wooden spoon.

So...yeah not a whole lot of activity. At least not like it was day 2. There are some bubbles but nothing too impressive.

End of Day: add 1/2c whole wheat flour and 1/2c filtered water.


Day 6

Mid-day: stirred the contents with wooden spoon.

Come on!
Alright, I'm trying to figure out what I did wrong. I know I'm seeing some bubble mid-day but there is not a distinctive level change in the starter. I'm really wondering if I disturbed it too much when I changed jars on it.  I plan on doing the last feeding tonight. I'm keeping my fingers crossed and hope tomorrow it will show some signs of life.

End of Day: add 1c whole wheat flour and 3/4c filtered water.

I used 3/4c of water instead of 1c because It was just too wet.

19 May 2012

Candied Apple Ice Cream Pie

Kalen and I were planning on baking Conor a cake for his Birthday. But after consulting Kalen's Mom what was Conor's favorite cake, we learned he prefers pie. Apple pie is his favorite. So, we thought we would do something a little bit more special. Traditionally, hot apple pie is served with vanilla ice cream; however, we don't do things traditionally in this house. :P

Let me present...

 Candied Apple Ice Cream Pie

 Crust

 In bowl, use fingers to rub

  • 1c all purpose flour
  • 4T of butter, cubed
 Once it looks like bread crumbs, add
  • 1T sugar
  • 1 egg yolk
  • 2T cold water

Mix together and collect all breading in bowl. Transfer to lightly flour pastry board. Knead until lumps are out. Roll out to fit glass 8inch pan. Fork the bottom and cover with wax paper (should help it from rising too much). Cool in fridge for 35minutes and preheat oven to 400. Bake for 10minutes. Take off wax paper. Turn off oven and let sit for 20minutes. Remove and let cool. Place in fridge once glass no longer feels hot to touch on the bottom.

Apple Pie Filling

 May be complicated. Need Centrifuge.

Peel and core 4.5 granny smith apples. Slice and put into pot. Then, take the peels, cores, and 2 granny smith apples (chopped up), and send through centrifuge. Zest one lemon and put in pot. Send the rest of the lemon through centrifuge.  Pour all the liquid into pot.

Add

  • 3T butter, cubed
  • 1t cinnamon
  • 1/2t ground all spice
  • 1/4t nutmeg
  • 1/4t salt
  • 2T flour

Then heat on low and stir till the butter and flour has dissolved. Crank up to Medium till it boils while stirring occasionally. Then reduce heat to low-medium and let the liquid reduce and the apples cook. Remove apples from liquid once they are soft and put in bowl to chill in fridge.


Candy Apple Topping

Reduce the rest of the liquid from cooking the apples. Add 2T of brown sugar. Constantly stirring on low-medium heat. Do not let boil. Continue to do so for about 10-15minutes. Once the liquid is no longer runny. Add crushed walnuts. Continue heating on low till liquid is more syrup like consistency. Pour contents in bowl and scrap bowl of all syrup. Put in fridge to cool but not get cold (otherwise it will prove harder to spread over the top of the ice cream during assembly).


It will taste like candy apples that you get at the carnival or fair.

Vanilla Ice Cream (quick version, no egg)

In bowl, add

  • 2.5c heavy whipping cream
  • 1.5c 1% milk
  •  1T vanilla extract
Slowly stir in 
  • 3/4c sugar
Once sugar has mixed evenly. Sit the bowl in fridge to let cool for 45minutes. Use the directions for your ice cream maker.  Should take about 1hour to harden.

Assembly

 Remove from Fridge

  • Crust
  • Apple Filling
  • Candy Apple Topping

Take the Crust and relatively thin layers of

  1. Ice cream
  2. Apple Filling (it will sink)
  3. Candy Apple topping

Oh my Pie! :)
Put the pie into Freezer and let chill for a few hours. Then serve cold.

And there you have it...

The crust was crunchy and the candy apple topping just had a great punch on top. I really think centrifuge granny smith apples with lemon zest and juice really knocked it out of the park.

Good alternative to birthday cake for sure.

Note: Next time. Make the ice cream in advance. The Ice cream didn't want to set up in less than 6 hours.

18 May 2012

Pork stock and what it lead to

Open faced pulled pork sandwiches
Sprouts had a good price on Pork loin roast for 1.88lb. So I bought enough to make pulled pork.

I used vegetable/fruit stock to boil with lemon pepper corns and a bay leaf.  I stripped the meat and separated into  4 containers. And used a ladle of stock and different spice to flavor the four containers separately.  Kalen really liked using part hickory bbq sauce, garlic powder and the pork stock whereas, I really liked adding white balsamic vinegar, garlic powder, dehydrated pizza sauce, and pork stock. I guess he likes it sweet and I like it more acidic. It made really good sandwiches for lunch.

I also picked up potatoes at sprouts and originally intended to use the Idaho and sweet potatoes to dehydrate to make chips. However, after making pulled pork, I realized I had invaluable pork/vegetable stock left over. So I made mashed potatoes.

Boil in pork stock

  • 2 medium Idaho potatoes, cubes with skin on
  • 1/4 of a yellow onion, sliced
When potatoes are soft, add
    Thick and Creamy Mashed Potatoes
  •  3 garlic cloves sliced
Once garlic has lost its white color. Remove potatoes, onions, and garlic from stock to a food processor and season with cracked pepper and pinch of dried basil (or parsley).

Turn on low, add

  • heavy whipping cream
  • 1 T of butter, small cubes
 When the potatoes have been completely mashed, turn off processor and add melted cheese. I used Colby jack and spicy Wisconsin Cheddar. 


Now, I still had some stock left over and I couldn't just let it go to waste.

So I threw a handful of pinto beans and let sit on low for about 2+hours. Once soft. I threw a handful of brown rice (1:1 ratio to the liquid). And left on low until the rice absorbed most of the liquid. Turned stove off and let cool.


Meanwhile, all of this is going on, I dehydrated the sweet potatoes.

Took about 5hours I'm guessing because I lost track of time and don't know how long it took. Once they were crispy, I removed while still warm misted with sunflower oil and sprinkled cinnamon over them. And served as our dessert with few spoons of fage yogurt with clover honey.

Oh what next...

17 May 2012

Acorn Squash Chips

Inspired by the non traditional chip bag at the store. I wanted to make my own chips from acorn squash in the dehydrator. I sliced the Acorn squash to about 1/8inch thickness. Apparently 1.43lb of Acorn Squash, de-seed and stem removed, uses all 5 tray space and cooks for about 4-5hours..
52 calories of pure goodness!

While the squash is still warm in the dehydrator, pour each tray's contents one at a time into a bowl. Then mist with sunflower oil, sprinkled popcorn seasoning (or your seasoning choice), and toss chips. Repeat each tray in same bowl. And pour into a container or bag for storage. I really like this snack after tasting it. I feel a bit more in control of how much salt and oil goes on to the chips.

Besides reading up on calorie count of dehydrated Acorn squash (without oil or salt) comes out to 8 calories in 0.5c of sliced Summer squash.

So...guessing that my bag of squash chips to be about two cups which gives me 32 calories for the squash + 20 calories for the sunflower oil + 0 Reese Cheesy popcorn seasoning =  52 calories of pure goodness! A big plus no preservatives, mainly because they'll get eaten before going bad. Funny enough the shelf life of dehydrated squash is 1 week. Why? I'm unsure but best eat your veggie chips quick!

16 May 2012

Revisiting Sour Dough (part 1)

To further challenge myself and because I'm just curious if I can. I want to revisit the sour dough starter.

First, I learned that whatever you start with, that you must double at each feeding. Most if not all sour dough starter recipes ask that you start 1/3c water and 1/4c flour to 1.25c water & 1.25c flour, initially and get big quick.Which leads into the second thing I learned, you either have to bake with the starter or throw it out when you feed it otherwise your going to have more starter than you'll know what to do with. I'll explain further. And third thing I learned, I baked a lot of stuff because I didn't want to waste the starter. And gained a lot of weight and got tired of eating bread everyday. Though tasty just A LOT OF BREAD.

Now, the original recipe I used to make the starter is as follows.

Yeast: 2tsp (7g)
Water: 1.25c (300ml)
Flour: 1.75c (250g)

This mixture would yield about 1.25c of mixture and some. Then the first feeding would double to about 2.5c of mixture which by the end of the week I would have after doubling and not pouring out the mixture, 80 cups of sour dough. Crazy...though luckily I cut the recipe in half when I initially made the starter.

So, I'm breaking down the mixture to something more manageable for the next seven days, I'm willing to try making the sour dough starter with the following using whole wheat flour.

6oz Mason Jar

Day 1 (today)

Yeast: 1/8tsp (0.7g)
Salt: 1/16tsp (0.3g)
Water: 1T (15ml)
Flour: 1T (7g)

I added the salt to the yeast to help boost it. Used warm water to dilute the yeast and salt. Added the flour. Stirred and capped it with a small food shower cap. My feedings for the next 5 days will consist of the following.

Day 2 3 4 5 6
Water 1T 1/8c 1/4c 1/2c 1c
Flour 1T 1/8c 1/4c 1/2c 1c

Day 7
I'll remove 1T of the mixture and put it in a container and start feeding again. And use the 1 7/8c + 1T of sour dough starter for baking

If everything goes well, my goal is to push out baking from an everyday to a once a week adventure. I'm hoping this initial start up works because I honestly don't want to make the amount from the original recipe.

Wish me luck :)

6.5lbs of Beef = 2lbs of Jerky

P&G sometimes has a special at the HEB. So spend $30 on P&G products and they will reward you with $10 off your next $30 purchase of non- P&G products which also exclude Alcohol and Tobacco. So...I figured what better way to spend our $10 off coupon than on 6.5lbs of Beef. Our total at the register (no taxes on food in TX) came to $30.07 then coupon applied, a grand total of $20.07 for 6.5lbs of lean top round roast beef which will be turned into some beautiful jerky.

In order to really enjoy our 6.5lbs of beef. I took the last of the jerky mix which had a lot of flavors but nothing really stood out. And then I made for the first batch and then created four more jerky flavors.


Note to self: 6.5lbs of jerky could have easily made 10 different flavors. One flavor per tray. Or just buy 2-3lbs for one batch.
 
Mexican Mix
Szechuan Mix
Thai Mix
Pepper Mix
1/2T minced garlic
1/2T turmeric
1/2T chili powder
1/2T white pepper
1/2T ground cumin
1/2T salt
1/2T lime pepper mix
2T oregano leafs dried
1T crushed red pepper
1/2T minced onion
1/2T thyme
1/2T white pepper
1/2T lemon pepper
1/2T salt
1/2T Szechuan pepper
1T garlic powder
1T oregano leafs dried

1/2T minced onion
1/2T lemon grass
1/2T galanga powder
1/2T white pepper
1/2T coriander seeds
1/2T salt
1T garlic powder
1T basil leafs dried
1.5t ground cumin
1t lemon pepper
1t five color pepper
1t garlic powder
1t minced onion
1t white pepper
1t salt
1t crushed red pepper

I made 5 bags of marinated meat with the following spice blends. The weight of each bag varied do the amount of spice mixes volume were different. First jerky mix equated 1.33lbs, Mexican Mix 1.71lbs, Szechuan Mix 1.63lbs, Thai Mix 1.175lbs, and Pepper Mix .88lbs (this included the weight of the bag).

I'm wanting to do two batches. I'm curious to know if marinating the meat for a longer amount of time truly makes a difference in flavor. 

The first batch, marinated for 13hours and dehydrated for 6-7 hours.
Flavors did prove to be better than the first batch that I did with the original mix which marinated for 1hour.

The second batch, marinated for 48 hours and dehydrated for 6-7 hours.
Cooking during this post

Overall, I had high expectations of all the mixes though Szechuan Mix, I feel that the Szechuan pepper corns were over shadowed by the thyme which I didn't expect to take on such a dominating roll in that mix. The Thai Mix was pleasant, not spicy but stands on its own as well rounded. I'm pleased with the Pepper Mix and I may experiment with the Mexican Mix to add more citrus notes.

Very happy with the dry mixes. My next stop in Jerky flavor discovery may be using a wet mix, though I will not enjoy the clean up. And I'm looking forward to trying other lean meats, excluding chicken.

13 May 2012

Dehydrator and Dinner:Salmon over rice with veggies

So...I've been patiently waiting for the dehydrator to arrive. Kalen and I left it by accident at the house after the wedding However, to our surprise, Mom and Marc decided to buy a new one off of Amazon for two reasons. One shipping would have cost the same or more than the new dehydrator. Two from what I recall the other dehydrator was massive, so we probably would have been struggling for space which the one we got is much more comfortable to situation in the apartment laundry room.

Meanwhile, for the last 4 days I've been cranking out goodies. I want to test how efficient this puppy is. One thing I didn't care about the model was that there is no temperature gauge. Though I guess it wont matter for right now since someone is home most of the time monitoring it while its running.


Selecting product. So jerky is supposed to keep from 1month to 2 years depending whether or not you use a cure. Though, what usually happens is that jerky never lasts more than a few days because its consumed. And can not really test the theory of how long it really could last. Now, everything that I've read about jerky describes selecting the leanest meat possible. For good reason, the high fat content in ground beef for example would turn rancid if left out. Though you can make salmon jerky which has a very high fat content. You just have to stick in the fridge. Now that said, we selected a choice top round roast since there is a very low content of fat in the meat for our jerky.

Day 1-Beef Jerky (no photo we ate it too quick) and pizza sauce

 Meat, roll in dry rub and marinate 1hr in fridge
  • >2lb of Top Round Beef, sliced thinly against the grain
Dry rub, grind in magic bullet
  • 1T salt
  • 3/4T garlic powder
  • 1/4T lemon grass powder
  • 1/2T white ground pepper
  • 1T five color pepper corns
  • 1/2T lemon pepper corns
  • 1T oregano, whole dried
  • 1/4tsp black cumin seeds
  • 1/2T cumin ground
  • 1/2T minced onion, dried
  • 1/2T orange pepper (central mkt)
  • 1/2T dynamite Dallas Chili powder (central mkt)
Dehydrate about 4hours or more depending on thickness of meat.
 
Pizza Sauce, puree
  • 2 vine ripe tomatoes
  • italian spice mix
  • nutrional yeast
  • sprinkle more dried herbs on top of puree
Use olive oil and coat fruit leather sheet and pour puree. Dry for about 5-6hours. Grind in magic bullet. Should make about 1/4c of dry mix.

Day 2, 3-Tomatoes and veggies


Since Sprouts had vine ripe tomatoes on sale for 49cents a pound. Yeah it was time to test how the dehydrator would do tomatoes. It took 2.5 batches to finish off the tomatoes, 8hours each batch. Do not spray oil on trays.

  • 8lbs of Tomatoes, made about 7.1oz of dried tomatoes which fills about 3/4 of a 1 gallon zip lock bag
  • 1/2  white squash, thinly sliced for chips
  • 1/5 celery, 1/2 inch thick sliced blanch in 1/2t baking soda & 1c water (keeps from browning)
The dehydrated half of the squash to see how it tasted. Makes very tasty chips. For a fact, I'm curious if it would be good with salsa. And the celery I powdered as best as I could and added sea salt to make celery salt. These took about 5hours

Day 4-Veggies and strawberries


After washing all the tomatoes stuff off the racks. I started another batch to free some space up in the fridge.

  • 3/5 celery, 1/2inch thick blanch in soda/water
  • 1lb strawberries, >1/2inch slices (remove tops)
  • 1/2 white squash, thinly sliced for chips
  • yellow squash, thinly sliced for chips
  • 1/2 zucchini, thinly sliced for chips
  • 9 baby carrots, sliced length wise in strips blanch in hot water (save hot water)

Meanwhile, I prepped dinner.

Salmon over rice with veggies

Defrosted Salmon that was on sale a few months ago. Luckily no frost was formed around the fish. Marinated with sauce from the veggies and white sauce by pureeing with sesame soil, roasted white and black sesame seeds, dried minced onion, miso, soy sauce, and sugar. I took the left over blanching water that I used for the carrots to cook rice. Then I panned fried the Salmon in sesame oil, olive oil and chili oil mix to crisp the skin and top of fish. Sauteed the left of vegetables with green peas over medium heat. When the sauce started bubbling remove fish to plates, then add in the rice to finish. I added a bit more sesame oil to crisp the veggie rice mixture. Serve warm. I added red pepper flakes to mine.

07 May 2012

King Oyster Mushrooms in White Sauce over Squash Noodles

Kalen and I had stopped by the big Asian market off Lamar. And picked up a variety of mushrooms. So today, I'm going to finish off the last of the Swiss chard and basil to pair with the mushrooms. And instead of using noodles I'm going to try using squash. Mainly because I've been curious about using zucchini as noodles. If it proves to be pretty tasty I may consider purchasing a spiral vegetable slicer. I've been thinking about getting one for the last year but just wasn't sure how often I would use it.


King Oyster Mushrooms in White Sauce over Squash Noodles

Heat over medium
  • 1T olive oil
  • 2T butter

Stir in and saute till transparent
  • 1/4 of yellow onion, minced
  • 1/2c diakon radish, thinly sliced sqaures

Then add in till brown
  • 2 King Oyster mushrooms, thick sliced squares
 Once mushrooms start to turn brown, cover bottom of pan with
  • a splash of saki

Finally add and stir in

  • dollop of 0% Greek yogurt
  • Swiss chard, thinly sliced
  • 2 bunches of basil leafs, thinly sliced
  • ground white pepper
  • roasted garlic powder

Pour over
  • 1 yellow crookneck squash, thinly shredded
  • 1 zucchini, thinly shredded
  • 1/2 Mexican squash, thin chunks (farmers mkt)
Serve warm and drizzle soy sauce over.
 
Note:
 
What I might had done differently was use heavy cream vs yogurt to give it a more creamier texture and use less sake than what I did use. As well try using a wok to cook with than a saute pan to brown the mushrooms.

06 May 2012

Toowee Cookies


To celebrate our 1st Month of Marriage...Cookies with some Jazz! I wanted to keep things spicy and sensual! What better than to add a kick of chili pepper and chocolate. Nuts you say? Oh hell lets toss in some pumpkin seeds too. And when you think its just too crazy...what happens when two words are at the tip of your tongue but only one word come out of your mouth? A baby and what do you get with tea and cookie? Toowee to which I name these cookies. Because mainly, they are the batch size just great for two.  Makes 8 large cookies and they taste pretty good with green brown rice popped tea with clover honey.

Toowee Cookies

Cream
  • 3/8c (6T) margin 
  • 1/2c packed brown sugar
  • 1/4c white sugar
Add and mix
left 375 for 15min, right 350 for 15min
  • 1 egg
  • 1/T vanilla extract
  • 1/4t cayenne pepper
  • 1/4t ground cardamon
  • 1/4t salt
  • 2t cocoa powder
Sift and mix
  • 1c white whole wheat flour
  • 1/4t baking soda
Add and mix
  • 1/2c dark chocolate chips
  • 1/8c crushed walnuts
  • 1/8c raw pumpkin seeds
Preheat oven to 375 and bake 12minutes for darker crunchier cookies.
Or preheat oven to 350 and bake 15minutes for lighter chewier cookies.